Showing posts with label DIY - Crafts. Show all posts

Sunday, August 6, 2017

The New Pioneer Magazine Fall 2017


Summer is flying by!

Like many of you, our summer has been packed full of adventures.
Long days of fun (and work) in the sun, can make for a sore body and tired mind.

How about a little pampering with some home made bath salts made with dried herbs and essential oil?


The Fall issue of The New Pioneer magazine is on news stands now.  In it you will find my easy DIY article with steps on how to dry herbs and make bath salts that will help calm your mind and pamper your body...something we all need every now and again.

With Fall knocking on our door, Christmas is right around the corner.
Add a pretty tag and bow, and this will make a great gift for someone.

Tuesday, May 9, 2017

Graduation Cap Card Holder


It's almost graduation time!

One of the most popular gifts to give at graduation parties are cards.

As the proud parent of a graduate this year, I wanted to create something unique for people to place those special cards in.

I decided to make a graduation cap card holder.

Monday, April 10, 2017

Learn How To Blow Out Eggs

Have you ever wanted (or needed) to know how to blow out an egg?
Blown out eggs are great for crafts, Easter egg coloring, and farm fresh egg arrangements.
Maybe you have an egg eater and want to try the egg filled with mustard trick.

You do not need anything extreme to blow out an egg, just a few things that you probably have lying around the house.
Click here to read how to blow out an egg.  I have a tutorial, with pictures, in an article that I wrote for Community Chickens.

Wednesday, December 21, 2016

DIY Christmas Wreaths


Weather you consider yourself crafty or not, I guarantee this is one project anyone can do.

With a little creativity you can make your own wreath!

And for a fraction of what a store bought decorated wreath costs.

I have been making Christmas wreaths for years.
Some for myself.
Some as gifts.

If you haven't made one yet, I hope you will soon...

Monday, December 12, 2016

Living On The Edge With A Christmas Stocking


In my last post, I left you with a cliff hanger...

...I hope you didn't loose any sleep over it. ;-)

I pointed out to you that I didn't use a wreath on the front door...

The reason?

Well...

Yep, I've decided to live on the edge...


I am using using a Christmas stocking on the front door instead of wreath!

I know, I know.

Risk-ayy.

If you want to join me on this rebellious journey, I welcome you.

Stuff a stocking with some grocery bags to fill it out a bit.

Place some greenery inside.


If you're really feeling edgy, go ahead and add some ornaments or pine cones or berries.

Then hang it on the door.

Oh yea, living on the edge.

;-)

Thursday, October 6, 2016

Tucking Fall Into Our Lives


Fall is my absolute favorite season!
Tucking a little fall into our lives makes my heart sing.


I love to feel the crisp air that blows through the house when the windows are open.

Sunday, January 17, 2016

How To Dry Oranges In The Oven


Did you know that you can dry oranges in the oven?
No expensive dehydrator needed!


Just a couple hours in the oven and I had these beauties.
I love how the light shines through the orange slices.

Sunday, January 10, 2016

DIY Peppermint Bath Salts


Soothing bath salts infused with peppermint oil can have a calming effect on the body and help to relieve sore muscles.

Sound like something you need right now?


Peppermint essential oil is the first oil we ever tried.  And now it is a staple in our home.
It works great for headaches!

It's easy to make your own peppermint bath salts...all you need are three ingredients.


DIY peppermint bath salts
1 cup Epsom salt
1 tablespoon baking soda
4 drops peppermint essential oil
Mix all together.
Put in a mason jar secured with lid and band.


Add some twine and a tag, and voila!  you've got a gift.
DIY Peppermint Bath Salts are the perfect gift for...
Birthdays
Christmas
Anniversaries
Get Well Soon 
Hostess Gift
or
Just Because
...who says there has to be an occasion?


Happy Soaking ;-)

Sunday, December 13, 2015

DIY Glittery Snow Covered Branches


I've been playing with sticks again ;-)
and spray paint!

I love using natural elements in my decorating whenever possible.

Of course in the summer, there is always fresh flowers, fruits, and vegetables.

The fall season offers colorful leaves, pumpkins, and pine cones.

Recently as the beautiful fall colored leaves disappeared leaving bare branches, I used those in my home decor adding some texture.

As the winter season approaches I am still using those beautiful sticks, but kicking them up a notch...


with glitter spray paint.

Friday, September 18, 2015

How To Make A Bandanna Pumpkin


Last year, when I was a new blogger I shared how to make bandanna pumpkins.

Since I have gained many awesome readers and followers in this past year, I thought you might enjoy this post pulled from my archive.

Bandanna Pumpkins


Do you have some bandannas stuffed in a drawer somewhere?  If not, don't worry...I picked some up at Hobby Lobby for 99 cents each.  I was surprised at all the different styles and colors available in bandannas.  I decided to stick to the traditional bandanna pattern and chose two shades of blue for my pumpkins.  I did my fall fireplace mantel this year in blue and cream (you can see that post here), and wanted to stick to that color scheme.

Wednesday, September 9, 2015

DIY Fall Art (using scrap book materials)


I like creating little pieces of  'art' for my seasonal decorating.

Adding little punches here and there, without spending a lot of money...that's my style.


I recently purchased a 12x12 frame for half off the original price.
That's the only investment I have in this project.  And I will use this frame over and over again, making it well worth the $10 that I paid for it.  ;-)

Friday, September 4, 2015

Fall Home Tour 2015


Welcome to my Fall home tour!


I am so excited to be sharing my home with you during my favorite season.

Monday, March 16, 2015

Edible Easter Center Piece


I usually do an Easter center piece for the table that consists of a cute basket or dish, fake Easter grass and colored eggs that the girls and I create.

This year I wanted to do something different.

A fun and easy way to display (and eat) Easter candy.


An edible Easter center piece, filled with some yummy Easter candy.


**************************************************
Supplies needed:

Some type of jar with a lid (to help protect the opened candy) 
I used one that I already had

DIRT - Oreos 
I separated the cookies, and only used the halves with not so much white filling

GRASS - green sprinkles

CHICKENS - peeps

EGGS - jelly beans and other assorted candies that look like eggs
**************************************************


**************************************************
Create it:
Wash and dry the container.

Place the oreos in a baggie and smash with a rolling pin.

Place the 'dirt' on the bottom.

Add some 'grass'.

Delicately place your 'baby chicks' in place.

Tuck some other 'eggs' around the display.

What makes this edible display so good is that you can eat what you want, replace it and no one will ever know.  ;-)

Or...you can have a casual visit with a friend while nibbling on some candy as you reminisce.
**************************************************


Thursday, January 29, 2015

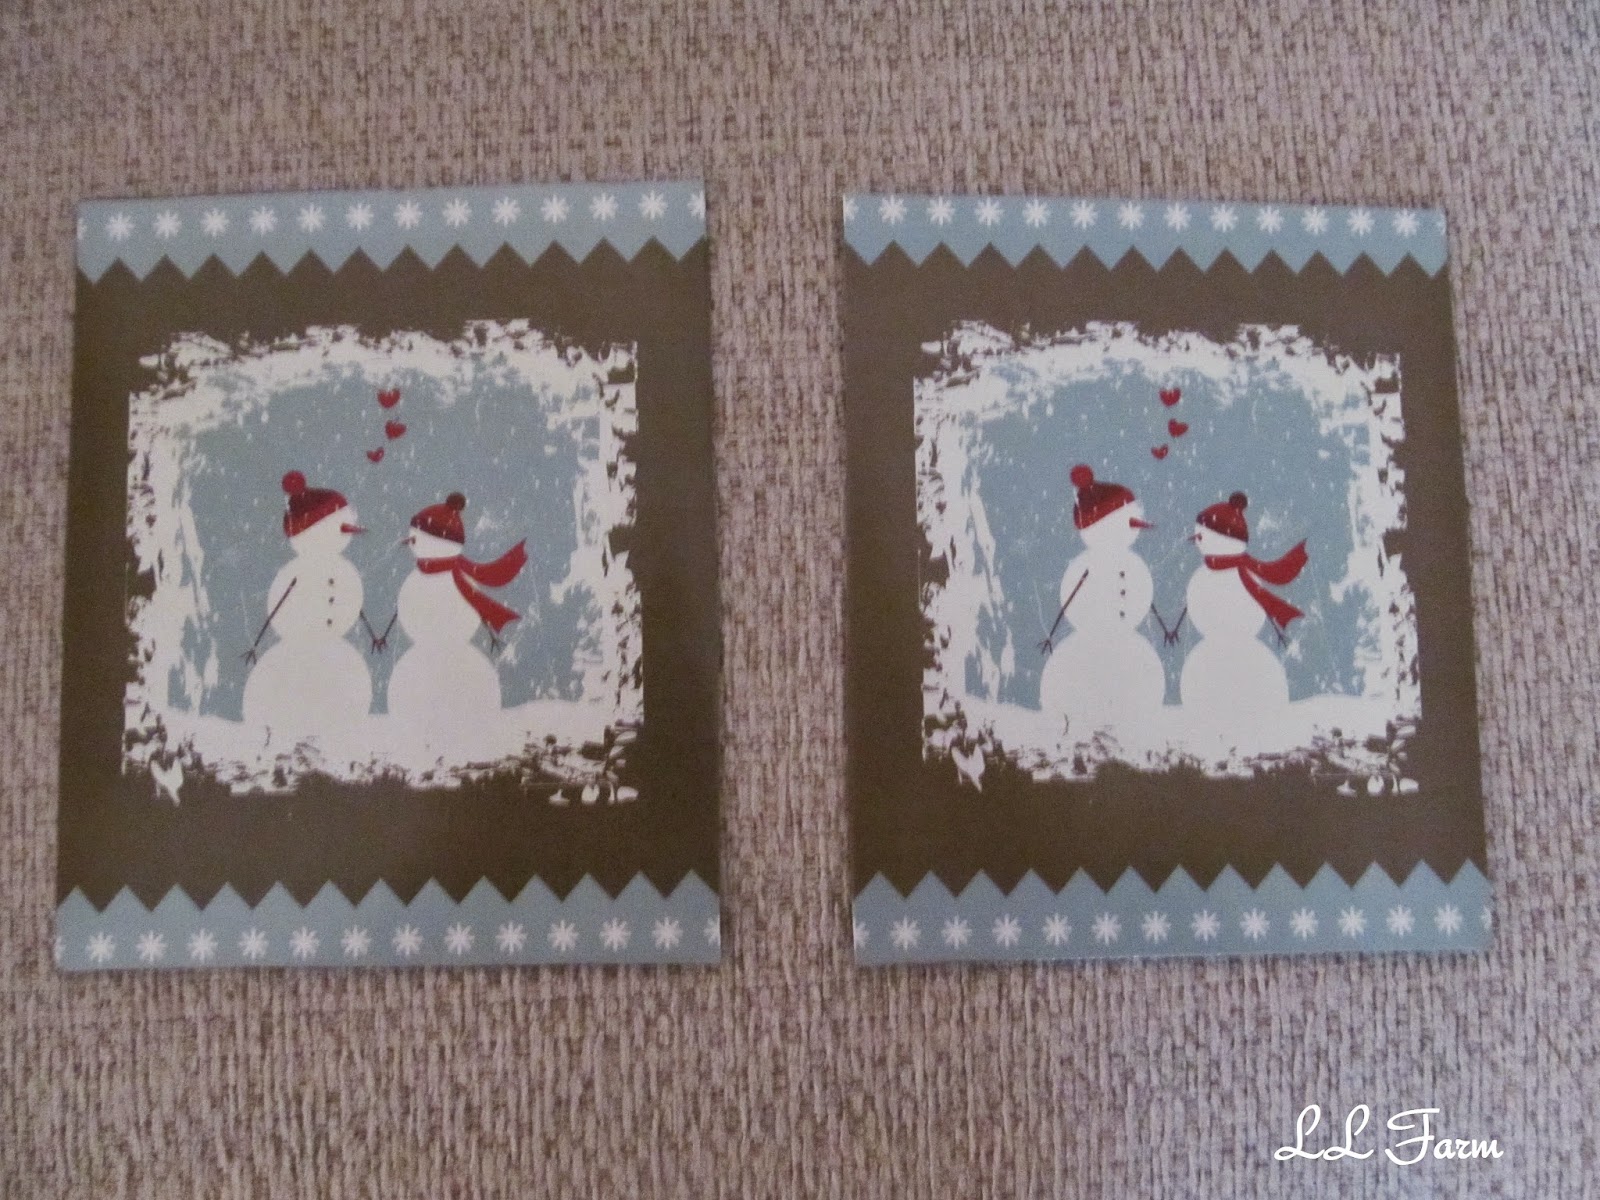
Framed Valentine Art Made From A Box Of Tissues


I don't usually decorate for Valentine's Day.  To celebrate the day, I create little cards to put in hubby's and the girl's lunchboxes.  The girls get a bit embarrassed as they are getting older, but that's ok, I'm their Momma ;-)  Other than that, it's just not something that I have a tub of decorations for, or really any decorations for.

So why did I decide to create a little Valentine decor this year?  Well, it all started when I was grocery shopping the other day...

It's that time of year, when we seem to go through a lot of tissues.  This is one of those items that I buy off-brand.  So, as I was grocery shopping, I thought I would go ahead and pick up some.  I have never tried this brand of tissues, but my eyes lit up when I saw this particular box.


It has snowmen (I have a collection of snowmen scattered here and there throughout the house in the winter months).  It has hearts (hello Valentine).  The colors blue and brown are perfect to match my living room decor, and it seems to already be in a 'frame'.

Yes, I was buying a necessity, but my brain was whirling ;-)  I envisioned framing that cute little scene and making a little vignette.  Once I snapped back into reality, I finished my grocery shopping.

I like to re-purpose things out of every day items for a few reasons:

* It is a way of re-cycling or re-purposing something that would normally be thrown in the trash after its original use.

* It is usually a quick, easy, and inexpensive craft.

* It's a way to express creativity.

* It is a one-of-a-kind creation.


I have a stack of frames in the basement that I bought at a yard sale for a couple dollars.  I chose a larger frame because the 'picture' itself is small.  I had the idea in my heady (scary, I know) to make the small picture pop, by adding a colored mat.   

I painted the frame with some white paint that I already had.  


I cut the 'pictures' from the tissue box.  Look how cute they are...they are holding hands.  I wonder what they are saying to each other?


I used the picture/mat that was already in the old frame as a guide to trace on my piece of scrapbook paper.  You could also use the glass insert.  Using either one will give you the correct measurement for the mat.  To give it a little pizazz, I chose a reddish color scrapbook paper (from my stash) to create the mat.  The color of the paper makes the red in the picture 'pop' out.


This scrapbook paper cutter is one of the best purchases I have made.  Without it, I cannot cut a straight line, even when it is drawn for me.


I ended up cutting the blue outline with snowflakes that was on the top and bottom.  It just didn't look right, without being on all sides.


I centered the picture on the paper, gluing it down with regular ole school glue.


For the vignette, I added a snowman with a burgundy jacket.  The color ties in with the hearts, hats, and scarf on the snow people.  It also blends in with the mat color.  The snow covered candle holder is re-purposed from a jar of peaches.  Click here to see that easy project!


Voila!  I have created a little Valentine vignette with a box of tissues and a jar of peaches.  Uuhh, I mean a beautiful piece of framed art and a winter candle holder ;-)


Wednesday, January 21, 2015

Welcoming Winter Wreath


This time of year, our front porch looks scarce and bleak.  The patio furniture has been moved to the basement, there are no blooming and aromatic flowers tucked away in vintage watering cans and other pretty containers.  The standard decor on the porch for the winter is a stack of fire wood.

To brighten the porch area a little and to help make a warm welcome to approaching guests, I like to hang a home made wreath on the door.  I am loving the look of  a burlap wreath.  To me, burlap exudes cozy, simple, timeless.

I knew that I wanted the same burlap look, but decorated differently for seasons or holidays.  By strategically placing things on the wreath and not using a hot glue gun, I have that freedom to keep decorating the same wreath, and not having to make another one.  What a time and storage space saver ;-)

In November I made a basic burlap wreath.  You can see my easy step by step tutorial here.  I embellished it for Christmas with just a few holiday picks.  Click here to see it all decked out for Christmas.  I just stuck the stems into the burlap and the wreath form, no hot gluing involved.


After Christmas, I found this package topper on clearance.  The blue is such a soft, serene color with a little shimmer, reminding me of a crisp blue sky.  The 'O' is a snow flake with a rhinestone in the middle, and a blue outlining shape.  


I removed the adhesive from the back and hot glued this fastenter on instead.  Now I have the ease of just pinning it in place (and moving it around if I want to).


I purchased a bag of the fasteners at Hobby Lobby.  They also came in handy when I wanted to attach a wooden letter to a wreath that I recently made as a gift.  (Lovely basement wall back drop, huh?)


I really like this simple look, but...


I decided to add a few snowflakes in blue and silver for just a little glitz.  They are picks that I stuck into the burlap and the wreath form for added security...no glue.


 Some may see a wreath with the word snow and snow flakes, but I see, "The snow is beautiful, but welcome, come on in and let's visit for a while".

I have some up-cycling projects in the works that I will be sharing soon!  I would appreciate you following along - Google Friend Connect, subscribe, and follow by e-mail are located on the right side bar...Thank You!

Sharing at:  Wow Us Wednesdays   Wake Up Wednesday   Treasure Hunt Thursday   Home and Garden Thursday   Share Your Cup Thursday   Thursday Favorite Things   Foodie Friday and Everything Else   Feathered Nest Friday   Show and Tell Friday   Farmgirl Friday   The Scoop     Home Sweet Home   Metamorphosis Monday

Monday, December 15, 2014

From A Jar Of Peaches To A Snow Covered Jar

From a jar of peaches to a snow covered jar.


I will start with a confession...I did pay a little more for this jar of peaches, compared to the canned variety that I would usually buy, but the jar was so pretty...I knew I would do something with it.

This little DIY project is easy to do in just a few minutes, but can give such a wow factor, and it is up-cycling! 


Cast of characters: 
a glass jar (be creative in what you choose)
painters tape
foam brush (I rinse it out after each craft project and reuse, reuse, reuse)
mod podge
epsom salt
paper plate


Remove any labels from the jar.  Use painters tape to mark off where you want to stop the snow.  I can't draw (or make) a straight line...never have, probably never will...  so forgive me if it's a little crooked.  Actually, let's just call it rustic (smile).  

Using a foam paint brush, smear mod podge below the tape line.  With a paper plate under, sprinkle epsom salt over the mod podge.  Let dry.

Next...
no wait...
that's it!

  
Put some more epsom salt inside the jar and put a candle in.


Tie some twine with a Christmas bulb around the top.


Once Christmas is over, put some pine cone and berry sprays in for a wintery look.

This would also be adorable with some wrapped candy put inside the jar.  I would take a picture of that, but....


Lily said it was taking longer to do this post than it actually took to do the project.  She put her paws up as if to say that she had enough, and off she went to sleep.

Sharing at:  Metamorphosis Monday   Tweak It Tuesday   The Scoop   Inspire Me Tuesday    Wow Us Wednesdays  Wake Up Wednesday    Down Home Blog Hop  Thursday Favorite Things  Share Your Cup Thursday
Related Posts Plugin for WordPress, Blogger...