Friday, January 30, 2015

Snow pictures from LL Farm


To all who were affected by the blizzard, I hope this finds you safe and well!

We only received a couple inches of snow this time (more to come Sunday).  

I enjoy the routine of going out every morning to feed/water the animals.

It is a great reason to be outside and stretch a little.

Taking deep breaths of fresh air is good for the lungs and refreshes the soul.  

Each day brings different or new sites to see in nature and at times, I am amazed at the beauty that lies within our little farm.

I don't consider myself a photographer by any means, but I do enjoy taking pictures.  Here are some things that captured my interest Friday morning that I want to share and hope you like.

Little pockets of snow on the pine trees.
Looking closely, some resemble cotton, others look like pearls.


I love how the dormers look blanketed with snow.


The weather vane bottom is covered in snow.
The sky is a shield of grey.


A cardinal perches on bare branches.
There is just something about the natural beauty of cardinals.


"Yes, I have been a good girl.  Now give me the bone!"


"Let me just try it first to see how cold it is."
Looking at this, I am reminded of a warm summer day....going swimming, but checking the temperature of the water with my toes first ;-)


Single file.  Easy does it.


"Bread for breakfast...yum."


Proof that the ladies are doing fine in the cold.
The brown eggs nestled in the white snow is a beautiful monochromatic picture. 


Cashmere is sitting and pondering whether she is ready to go out yet.


She didn't hesitate to come out when she saw me heading toward the barn.  She loves her morning hay and food.


Bogo (always the hog) says to Amelia, "Hey, do you have more than me?"

Each day is a gift.  There is always something to be thankful for!


Thursday, January 29, 2015

Framed Valentine Art Made From A Box Of Tissues


I don't usually decorate for Valentine's Day.  To celebrate the day, I create little cards to put in hubby's and the girl's lunchboxes.  The girls get a bit embarrassed as they are getting older, but that's ok, I'm their Momma ;-)  Other than that, it's just not something that I have a tub of decorations for, or really any decorations for.

So why did I decide to create a little Valentine decor this year?  Well, it all started when I was grocery shopping the other day...

It's that time of year, when we seem to go through a lot of tissues.  This is one of those items that I buy off-brand.  So, as I was grocery shopping, I thought I would go ahead and pick up some.  I have never tried this brand of tissues, but my eyes lit up when I saw this particular box.


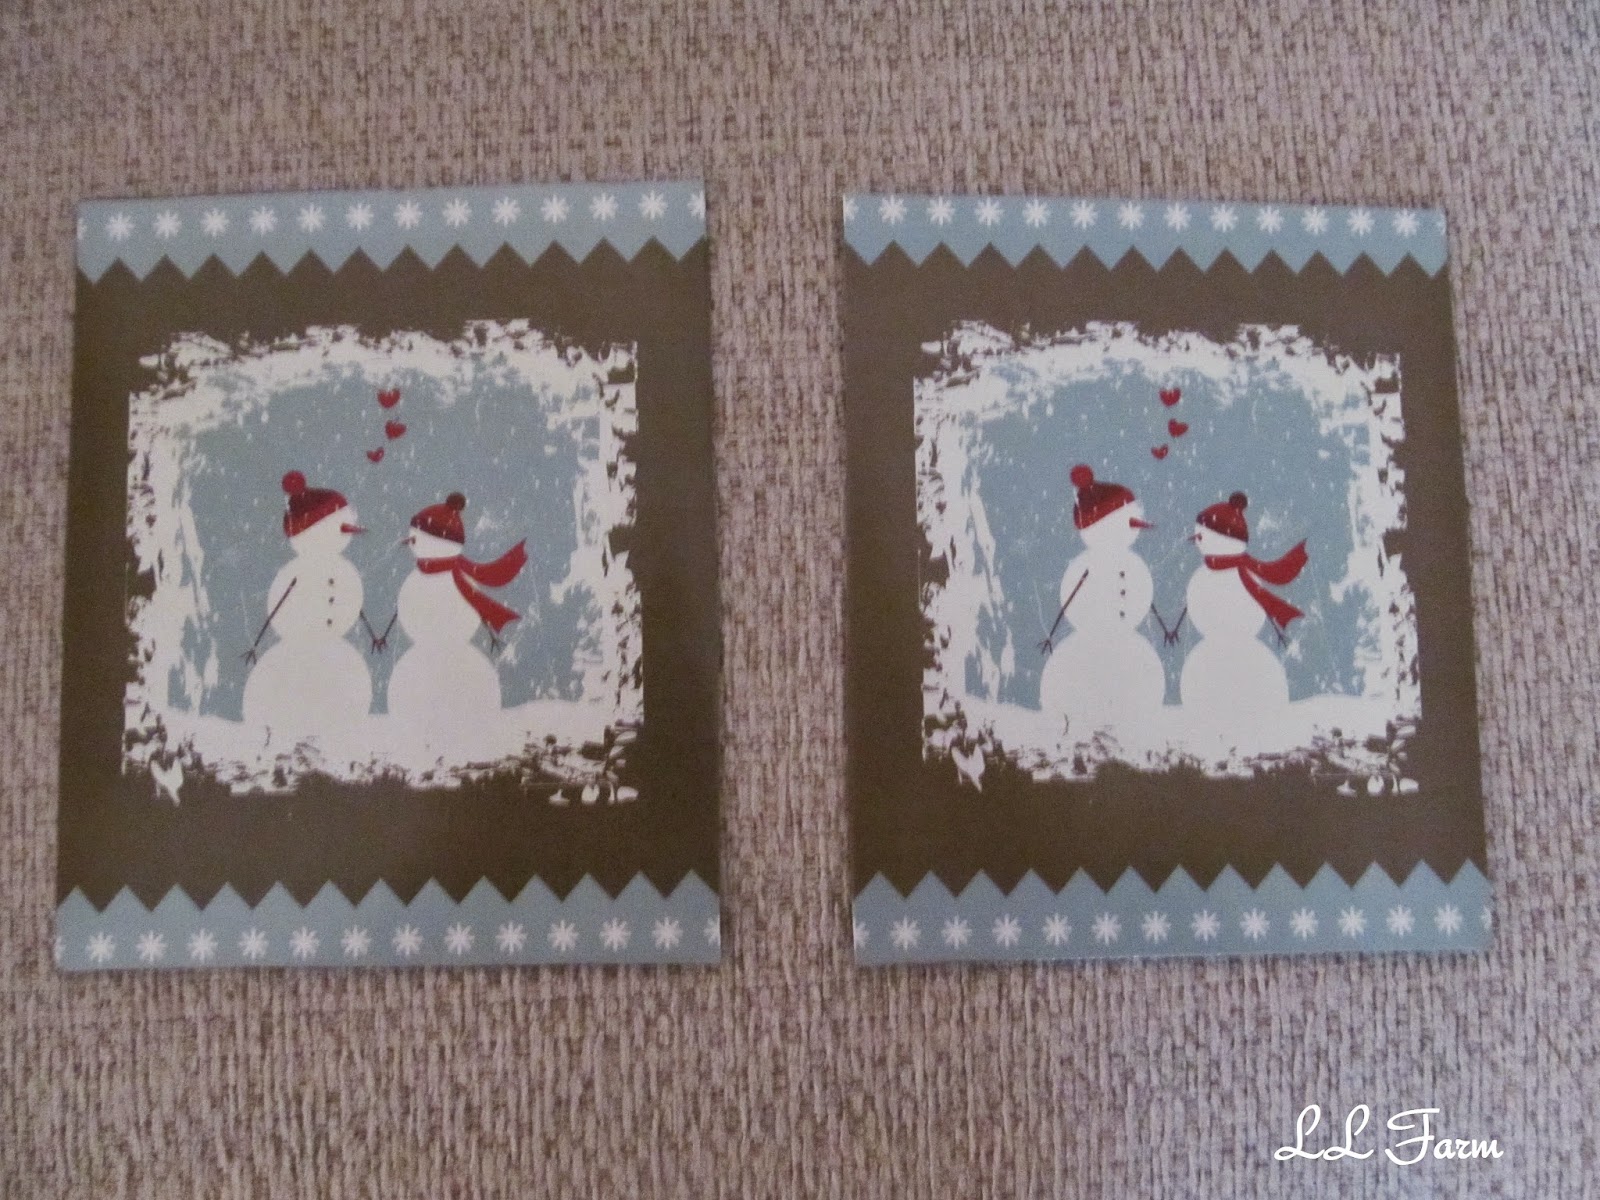
It has snowmen (I have a collection of snowmen scattered here and there throughout the house in the winter months).  It has hearts (hello Valentine).  The colors blue and brown are perfect to match my living room decor, and it seems to already be in a 'frame'.

Yes, I was buying a necessity, but my brain was whirling ;-)  I envisioned framing that cute little scene and making a little vignette.  Once I snapped back into reality, I finished my grocery shopping.

I like to re-purpose things out of every day items for a few reasons:

* It is a way of re-cycling or re-purposing something that would normally be thrown in the trash after its original use.

* It is usually a quick, easy, and inexpensive craft.

* It's a way to express creativity.

* It is a one-of-a-kind creation.


I have a stack of frames in the basement that I bought at a yard sale for a couple dollars.  I chose a larger frame because the 'picture' itself is small.  I had the idea in my heady (scary, I know) to make the small picture pop, by adding a colored mat.   

I painted the frame with some white paint that I already had.  


I cut the 'pictures' from the tissue box.  Look how cute they are...they are holding hands.  I wonder what they are saying to each other?


I used the picture/mat that was already in the old frame as a guide to trace on my piece of scrapbook paper.  You could also use the glass insert.  Using either one will give you the correct measurement for the mat.  To give it a little pizazz, I chose a reddish color scrapbook paper (from my stash) to create the mat.  The color of the paper makes the red in the picture 'pop' out.


This scrapbook paper cutter is one of the best purchases I have made.  Without it, I cannot cut a straight line, even when it is drawn for me.


I ended up cutting the blue outline with snowflakes that was on the top and bottom.  It just didn't look right, without being on all sides.


I centered the picture on the paper, gluing it down with regular ole school glue.


For the vignette, I added a snowman with a burgundy jacket.  The color ties in with the hearts, hats, and scarf on the snow people.  It also blends in with the mat color.  The snow covered candle holder is re-purposed from a jar of peaches.  Click here to see that easy project!


Voila!  I have created a little Valentine vignette with a box of tissues and a jar of peaches.  Uuhh, I mean a beautiful piece of framed art and a winter candle holder ;-)


Sunday, January 25, 2015

Yummy Pan Gravy


I must confess!  I LOVE pan gravy.  

Some people crave chocolate or caffeine, I crave pan gravy!

I love this stuff sooooooo much that I don't can't make it very often because, well.... I can't stop eating it, like I mean I eat it till it's gone or my stomach hurts so bad that I literaly can't eat any more.  I do make side dishes (like meat and potatoes) to put the gravy on, but, it is so good that I have been known to eat it plain...out of the gravy bowl, on a spoon, on my finger...

  Don't judge a woman in love until you try it ;-)


My favorite meat to use for pan gravy drippings is cubed steak.  We are blessed to fill our freezer every year with family raised beef....nothin' like it!  Look at the intense color of that meat.  The crevices are made by running it through a cubing machine.  Those crevices help lock in such flavor.  

Put some flour, salt and pepper in a dish.  Cover the steak all over with the flour mixture.  Fry it in a skillet with some vegetable oil (3 or 4 tablespoons).  Cook on each side 4-6 minutes.  I cook mine till it's a little crispy because it tastes so good with the pan gray, and it leaves good bits in the pan to make the gravy.  Once the meat is cooked, remove it from the skillet.


You will be left with this glorious stuff.  Oh what I am going to turn you into...


Add 3 - 4 tablespoons of flour and stir around with the pan drippings in the bottom of the pan, making a roux (a French word meaning a cooked mixture of fat and flour).  At this point, I add a little butter (for more rich flavor).  Make sure to scrape the bits off the bottom of the pan and stir into the mixture. Stir until the flour starts to brown (a minute or so).


Slowly whisk in 2 cups milk.  Add a little more salt and a lot more black pepper.  Cook and whisk over medium heat until it starts bubbling, reduce heat and cook until it thickens.


This is probably what a normal plate of food should look like.


But...at my place setting is a gravy boat waiting....


Recipe for Pan Gravy:

pan drippings (left from cooked meat)
1/4 cup all purpose flour
1 tbsp. butter
2 cups milk
salt and pepper (to your liking)

Over medium heat, stir together pan drippings, flour and butter, scrapping bottom of the skillet to get all the bits loosened up.

Slowly stir in the milk, salt and pepper.  Cook and whisk over medium heat until it starts bubbling, then reduce the heat and simmer to thicken, about 5 minutes. 

I hope it will be love at first bite for you ;-)


Wednesday, January 21, 2015

Welcoming Winter Wreath


This time of year, our front porch looks scarce and bleak.  The patio furniture has been moved to the basement, there are no blooming and aromatic flowers tucked away in vintage watering cans and other pretty containers.  The standard decor on the porch for the winter is a stack of fire wood.

To brighten the porch area a little and to help make a warm welcome to approaching guests, I like to hang a home made wreath on the door.  I am loving the look of  a burlap wreath.  To me, burlap exudes cozy, simple, timeless.

I knew that I wanted the same burlap look, but decorated differently for seasons or holidays.  By strategically placing things on the wreath and not using a hot glue gun, I have that freedom to keep decorating the same wreath, and not having to make another one.  What a time and storage space saver ;-)

In November I made a basic burlap wreath.  You can see my easy step by step tutorial here.  I embellished it for Christmas with just a few holiday picks.  Click here to see it all decked out for Christmas.  I just stuck the stems into the burlap and the wreath form, no hot gluing involved.


After Christmas, I found this package topper on clearance.  The blue is such a soft, serene color with a little shimmer, reminding me of a crisp blue sky.  The 'O' is a snow flake with a rhinestone in the middle, and a blue outlining shape.  


I removed the adhesive from the back and hot glued this fastenter on instead.  Now I have the ease of just pinning it in place (and moving it around if I want to).


I purchased a bag of the fasteners at Hobby Lobby.  They also came in handy when I wanted to attach a wooden letter to a wreath that I recently made as a gift.  (Lovely basement wall back drop, huh?)


I really like this simple look, but...


I decided to add a few snowflakes in blue and silver for just a little glitz.  They are picks that I stuck into the burlap and the wreath form for added security...no glue.


 Some may see a wreath with the word snow and snow flakes, but I see, "The snow is beautiful, but welcome, come on in and let's visit for a while".

I have some up-cycling projects in the works that I will be sharing soon!  I would appreciate you following along - Google Friend Connect, subscribe, and follow by e-mail are located on the right side bar...Thank You!

Sharing at:  Wow Us Wednesdays   Wake Up Wednesday   Treasure Hunt Thursday   Home and Garden Thursday   Share Your Cup Thursday   Thursday Favorite Things   Foodie Friday and Everything Else   Feathered Nest Friday   Show and Tell Friday   Farmgirl Friday   The Scoop     Home Sweet Home   Metamorphosis Monday

Monday, January 19, 2015

Small Bathroom Showers


We are thinking about finishing part of our basement....We know we want a family/game room, a kitchenette, and a craft room,  but....do we want to put in a bathroom?

Many sources, including BHG.com suggests that if you are going to finish part of your basement, you should include a bathroom, especially if the space will be used for entertaining.

If we chose to install a bathroom, do we go with a half bath (toilet and sink) or do we install a shower unit also?  Handy Hubby says if you're going to put a bathroom in, you should also install a shower.

Because of limited space, I think a corner shower cubicle will be best.  But I must tell you, while researching shower units on line, I found a lot of options.  My Bathrooms Shower Sets has a great selection to choose from.  They offer showers and so much more!

Some options to consider:

Glass doors - clear or textured, square or rounded, hinged or bi-fold, slider or pivot.

Stationary shower head or hand held.  Top mounted or side mounted.

Trays - plain or textured.  Surround walls - paneling or tile.

Color scheme - I am thinking that subtle blues and greens will definitely lighten up a basement bath.

Fixtures,  seats, and so on.  I could get all fancy here and say steam shower, body jets, or digital...but let's keep it real...it's a bathroom for the basement...I don't even have that fancy stuff in the master bathroom ;-)  

I am confident that if we choose to put a bathroom in the basement, we can have a shower that is not only usable, but a little stylish also!

All photos in this post are from My-Bathrooms.com


Friday, January 16, 2015

Snow Ice Cream

 
(The winking snowman)

The cold.  The snow.  The ice.  It is definitely winter here in my neck of the woods.  I love winter time...and snow!  The ice, not so much.

Actually I am a fan of nature, the changing of seasons, and the beauty that each bring.  Spring sprouts up new life with budding trees and flowers.  Summer brings working in the garden to help yummy fruit and vegetable plants grow into food.  Fall produces a harvest of our labor as we can and freeze food from the garden.  And  although Winter offers a more restful time, it also offers great opportunities for outdoor fun.

(I think Amelia (alpaca in background) wanted to help build this snowman)

As a little girl, I remember sledding, skating, creating snow people, constructing snow forts, and...snow ice cream!  And now, my youngest daughter loves to make snow ice cream!

It is easy to make with a few ingredients that you most likely already have.  She usually brings in a bowl full of snow, so I don't normally measure things.  So, use this "recipe" as a guideline, tweaking it to your taste.  You can't go wrong - it's snow ice cream (smile).

4 cups of clean snow
1 cup milk
2 to 3 teaspoons of sugar
splash of vanilla
Stir all together and enjoy immediately, because it will melt quickly ;-)

Doesn't it just sound glorious?  Snow ice cream!

Did you make this as child or do you make it now with your kids/grandkids?  Please tell me I'm not the only country bumpkin ;-)

Sharing at Simple Saturdays Blog Hop   Sundays at Home   Farmgirl Friday Blog Hop   Foodie Friday and Everything Else

Wednesday, January 14, 2015

Winter Dishes

I have been pining over these dishes for a quite a while now.  They are called Winter Frost by Pfaltzgraff. Enough said, right?  Retired.  Expensive.  Not in my budget.


I found some plates on e-bay that were affordable, so I bid on them.  That's all I have - 6 plates.  They are so pretty to me...such beautiful colors...a frosted woodland scene.  


Look at the details.
Frosted branches.  Gleaming leaves.  Pops of color through the winter berries.  Little pine cones.


I plan on using these dishes everyday throughout the winter.  *I am a bit giddy - I have never had seasonal dishes.*  Here is how I am enjoying setting the table with my new found treasure.

I don't want to put anything on top of the plates because I don't want to cover the beauty.  I also don't want a lot going on as far as the centerpiece...I want the plates to be the star!


My mom recently gave me this small blue mason jar.  I love the height of this to use as a centerpiece. It is the perfect height for the table...I don't need to move it when we eat.  I placed fresh cut cedar in the jar.  The branches and the cones mimic the scene on the plates.

To pretty it up a little, I tied some twine around the neck and placed the jar on a white snowflake candle holder.  The white is a nice contrast between the blue jar and the dark table.

Sometimes less is more....

Sharing at:  Wow Us Wednsedays,  Wake Up Wednesday,  Treasure Hunt Thursday,  Share Your Cup Thursday,  Home and Garden Thursday,  Thursday Favorite Things     Feathered Nest Friday     Foodie Friday     Show and Tell Friday     Sundays at Home     Metamorphosis Monday     The Scoop     Inspire Me Tuesday     Make It Pretty Monday     Tweak It Tuesday     Tablescape Thursday

Monday, January 12, 2015

Liebster Award


Recently I received some exciting news.  Cecilia from My Thrift Store Addiction nominated me for the Liebster Award.  Thank you so very much Cecilia! 

Although I have heard of this award, I must admit I didn't know a lot about it, so I did some research.  Here is a summary of what I found:

  • The Liebster Award is given to bloggers by other bloggers.
  • It is intended for bloggers with less than 200 followers ( basically as a way to introduce that blog to others and make new blogging friends).  I say, what a nice concept!
  • The word Liebster is a German word meaning 'dearest'.  A few synonyms for dearest in the English language are appealing, nice, engaging.    


The rules are:

1.  Acknowledge and thank the blogger who nominated you.

2.  Find an award image and post it on your blog. 

3.  Answer 11 questions from the blogger who nominated you.

4.  Share 11 random facts about yourself. 

5.  Nominate 11 blogs with under 200 followers to receive the award.

6.  Notify the bloggers that you nominated them.

7.  Give the nominees 11 questions to answer. 


Cecilia's questions for me:


1.  What has been your greatest blogging challenge?
My greatest blogging challenge so far has been posting real personal stuff about myself or my kids, so answering these questions is a bit challenging.

 2.  What's your favorite guilty pleasure?
I love chai tea latte!

 3.  Which blog post are you most proud of and why? 
Harvest Tablescape With Meaningful Items is a favorite of mine and of my readers.  I like it because the table was set with a harvest of things given to me.  I love pieces that have a story.

 4.  Who has inspired you most in your life? 
My mom!  She has always (and still is) there for me.  I have always said that I hope to be half the mom to my girls that she has been to me.

 5.  What's your favorite movie?
Sweet Home Alabama.  I love this movie because it is about a small town girl trying life in the big city, only to return to her roots.  

 6.  Would you rather spend the day at a spa or junking at a flea market?
A day at the flea market for sure!  It is something that my husband and I both enjoy.  Love the whole up-cycling and re-purposing thrill.

 7.  What's your favorite flower?
Yellow rose.

 8.  Assuming it was nice weather, would you rather go for a hike or stay indoors  
      with a good book?
A hike...being outdoors brings a sense of peace to me.

 9.  What is your biggest priority for 2015?
My biggest blogging priority for 2015 is...I would like to earn money from my blog.

10.  What 5 things would top your gratitude list?
My faith, my family, my health, my animals, changing seasons.    

11.  Are you more likely to spend on a vacation or home improvements? 
Home improvements...there seems to always be one (or more) going on ;-)


11 Random facts about me:
  1. I love to read ( and re-read) the Little House on the Prairie books (I have them all).
  2. I love to ride ATV's.
  3. I maintain the website for our church.
  4. I love white chocolate more than milk chocolate.
  5. My legs are full of metal (rods, screws, pins, plates).  I was hit head on by a tow truck when I was 18 years old.
  6. My mom is one of 10 children, 8 girls and 2 boys.  I have lots of aunts, uncles, and cousins.
  7. I met my husband by way of a blind date.
  8. I cannot sing.
  9. I don't like to drive.
  10. I love snow.
  11. My eyes change colors - blue, grey, green.

11 Bloggers that I nominate are:


11 questions for you to answer (I am using the ones that Cecilia gave me...they are good.)
1.  What has been your greatest blogging challenge?

 2.  What's your favorite guilty pleasure?

 3.  Which blog post are you most proud of and why? 

 4.  Who has inspired you most in your life? 

 5.  What's your favorite movie?

 6.  Would you rather spend the day at a spa or junking at a flea market?

 7.  What's your favorite flower?

 8.  Assuming it was nice weather, would you rather go for a hike or stay indoors  
      with a good book?

 9.  What is your biggest priority for 2015?

10.  What 5 things would top your gratitude list?

11.  Are you more likely to spend on a vacation or home improvements? 


I look forward to reading each of your posts!


Thursday, January 8, 2015

3 C's - Chowder, Cheddar biscuits, and a Cat in a basket

It has been COLD!  Teens during the day and negative numbers at night and mornings.  Tonight I wanted to make something for supper that would warm us up.  3 C's it is!  Chowder...so comforting and filling.  Cheddar biscuits...yummy and satisfying.  The last C...well, let's just say it will warm your heart...you'll see at the end of this post ;-)

This chowder has evolved over time, to include more ingredients than the original recipe.  Don't you just love a recipe like that?  Keep tweaking it until it is just right!

Chowder recipe:
6 medium sized potatoes, peeled and diced
water
4 cups milk
1 can corn
1 onion, diced
1 cup diced carrots
1 cup diced celery
2 tablespoons butter
salt and pepper
1/2 cup shredded cheddar cheese
5 bacon strips, cooked and crumbled

Put diced potatoes in pot and cover with water.  Add salt.  Bring to a boil.  Reduce heat, cover and cook for 10 - 15 minutes or until tender.  Drain.

Put potatoes back in pot and use enough milk to cover potatoes by at least a couple inches (approximately 4 cups).

Add corn, onion, carrots, celery, butter, salt, and pepper.  Heat to right before boiling, then reduce heat and simmer for 15 minutes, or until onion is softened.

Add cheese.  Stir and heat until melted.

Top with bacon before serving.


With this chowder, I like to serve it with some type of crusty bread or biscuit.  This cheddar biscuit is gooey delicious with a nice herb butter melted on top.

Cheddar biscuit with melted, herb butter recipe:
Pre-heat oven to 400'
1 1/4 cup baking mix
1/2 cup shredded cheddar cheese
1/2 water
2 tablespoons butter
garlic powder, parsley, pepper (1/4 - 1/2 teaspoon each)

Mix baking mix, cheese, and water together.  Place 8 spoon fulls on baking stone.
Bake at 400' for 10 - 12 minutes.

While they are baking, melt 2 tablespoons butter in microwave.  Stir in garlic powder, parsley and pepper.


As soon as you take the biscuits out of the oven, brush the melted herb butter all over.


And for the last C...drum roll please...

It's my Cat!  Ginger loves to snuggle in this basket.  She loves it even more in front of a warming, cozy fire.  So adorable...always warms my heart (smile).
Related Posts Plugin for WordPress, Blogger...