Thursday, December 21, 2017

Home Made Eggnog


I am sooooooooo excited to share this with you!


Home Made Eggnog y'all!
Home.Made.Eggnog.


Rich aaaaand thick...  this stuff is good!

My Dad and I are the only ones in our family that like eggnog, so I guess that's why I have only been exposed to the stuff you buy in a carton.  Now, don't get me wrong, the stuff in the carton is good, but I was curious...

...curious to know what homemade eggnog tasted like.  So I looked up some recipes, found ones that were fairly simple to make, tweaked just a tad, and BAM!  Homemade egg not is good   great   fabulous   OUTSTANDING!

Our ladies (also known as chickens to some people) have finally started laying eggs again, so I thank them for their part in this recipe.


Although not necessary, I used fresh nutmeg for this and may I just add...it smells amazing!


Because this recipe makes one quart, of course I put it in a mason jar.  Ahem, this will make a neat little gift. ;-)


Home Made Eggnog
6 egg yolks
1/2 cup sugar
2 cups milk
1 cup heavy cream
1/2 teaspoon nutmeg
1/4 teaspoon vanilla extract

1.  In a medium bowl, whisk the egg yolks and sugar together.
2.  In a saucepan, over medium-high heat, combine the milk, cream, and nutmeg.  Stirring often, bring the mixture to a simmer.  Do not boil.
3.  Mix a big spoonful of the hot milk mixture into the egg mixture.  Repeat a couple more times to  temper the eggs.
4.  Once tempered, pour the egg mixture into the the milk mixture that is left in the saucepan.
5.  Continually whisk for a few minutes, heating through. 
6.  Remove from heat and stir in the vanilla.
7.  Pour the eggnog into a covered container and refrigerate until chilled.  It will thicken as it cools.
8.  Serve with a sprinkling of nutmeg on top, if desired.


* Also shared at CommunityChickens.com *


Monday, December 18, 2017

Christmas Mantel 2017


And the stockings were hung by the chimney with care.


Although my Christmas mantle is simple this year, there is exciting news...


I hung Christmas stockings on the mantel for the first time...


...and they haven't caught fire yet!


Even without a fire, it is a cozy little spot that we all enjoy!

Merry Christmas!


You may also like:

2016 Christmas Mantel

2015 Christmas Mantel

2014 Christmas Mantel

Thursday, December 14, 2017

Winter Planning With Chickens


Although just a dusting, the snow seemed to make everything more beautiful!  I don't think the little chickens shared my enthusiasm though.  Just look at them talking about 'that white stuff'.  Funny girls!

Before the snow fell this year, we did some preparation for our flock.  Click HERE to read my article at Community Chickens.

Monday, November 27, 2017

Adventures in Raising Turkeys and Thanksgiving in New York City


Did the title make you turn your head and say "what?!?!?"

It guess it proves that my husband is right... You can take the girl out of the country, but you can't take the country out of the girl!

While recently traveling home from New York City, I received an e-mail pertaining to my 2015 article about raising turkeys for our holiday meal.  I had to chuckle when I thought about what I had just experienced...Thanksgiving dinner at Hard Rock cafe in New York City!

For the first time in my life, I didn't celebrate Thanksgiving at a family table.  This year we were in New York for the Macy's Thanksgiving Day Parade.  No homemade food, and certainly no homegrown turkey this year.


We did however have a traditional American Thanksgiving meal of turkey, mashed potatoes, stuffing, green beans, cranberry sauce, and pie.

It was delicious!  And fun!  YOLO! (You Only Live Once)


You can read about our turkey experience HERE.  It was a challenge, to say the least, raising that turkey for a true farm to table experience.  An adventure that included a crazy turkey and a cow friend.

Life is an adventure...do something today that makes you laugh!

Monday, November 20, 2017

Easy Homemade Applesauce


Making your own applesauce is easy peasy!

Two ingredients are all you truly need.

You don't even need to write this down or print this out...you got this.

Apples and water.  That's it!

Simple, simple, simple...it's my mantra for life...although not always achieved. ;-)


Any type of apple will do, as long as they are firm, not mushy.

If you're feeling like you need some sweetness, add some sugar.

If you crave a little spice in your life, add some cinnamon or another warm spice.

If you are feeling smooth, puree the apples into a smooth sauce.

If you're feeling like you want some depth, mash those babies with a potato masher and enjoy a chunky applesauce.

I have made this from my Mom's 'recipe' many times...you know the one where you 'add some apples and a little water' to a pot.  But for you my friends, I tried to pin down some measurements...

Easy Homemade Applesauce
4 apples, peeled, cored, and sliced.
1/4 to 1/2 cup water (basically enough water to prevent the apples from sticking/burning)
In a sauce pan, combine the apples and water.
Bring the mixture to a boil, then reduce heat to low, and cook until the apples have softened, 10 to 15 minutes.
Mash with a potato masher, puree in a blender, or blend with an immersion blender, to your desired consistency.
Store any left overs in the fridge.

And, if you are feeling like a domestic queen, make plenty to freeze or home can.

Wednesday, November 15, 2017

Pumpkin Log Recipe


Oh hello pumpkin log.  I look forward to greeting you every fall.

The smell of pumpkin wafting in the air evokes all the autumn feel goods, while the sprinkling of powdered sugar ignites my love for snow that  will soon be here.

Recently, when I went to make this,  I could not find the recipe in my over crowded recipe basket.  Thank goodness I had it on the blog!  Just in case you misplaced your recipe ;-) I thought I'd share it again...just in time for the holidays.

Whether this is your first time making a pumpkin log or you are a seasoned pro, I hope this pumpkin log recipe finds you cozy!

Sunday, November 12, 2017

Our Fall Garden


In July I shared with you our country garden, flourishing with summer produce.  The plants were neatly planted into raised beds, making for great growth.  The gravel pathways made it easy to meander through the space.  And it was all tucked inside the nostalgic white picket fence.  Can you tell I love the garden?  ;-)


During the harvest season, we enjoyed many garden-to-table meals, along with plenty of cherry tomatoes and peas straight from the vine.  I also preserved some produce through freezing and canning.

Tomatoes, peppers, and zucchini lasted a good while in our garden this year.  I credit most of the success to the good soil prep and the raised beds that weren't full of weeds.

In August, I planted more seeds to be able to enjoy a fall harvest...

The radishes took only a few weeks to mature.

Lettuce seeds quickly grew into beautiful, delicious leaves.

The kale was a flop...for the summer and fall plantings.  Maybe I'll change their place in the garden next year.


The snap peas are still hanging on, even though we've dipped into some cold weather here and there.  They should be ready soon. 

Most everything else has been pulled up and the garden is ready for a long winter nap.

This is my first time having a fall garden and I hope to expand my plantings for next year.

I'm always learning...

Wednesday, October 25, 2017

Why Chickens Molt in the Fall Time


Some of the trees are bare and so are the nesting boxes! 

Even other chicken owners that usually sell eggs have covered up their 'fresh eggs for sale' signs.

On my post for Community Chickens, I discuss why fall is a common time for chickens to molt.  Click HERE to read it.

Thursday, October 5, 2017

Tomato Pie


What do you do when it's October and you're still harvesting tomatoes?  You make tomato pie.  I used a combination of yellow and red tomatoes for this beauty.


This is a great recipe to use up those last few tomatoes of the season, or any time of year.  I used monterrey jack cheese because that's what I had in the fridge, but feel free to use your favorite cheese for this.  The parsley flakes add great color and flavor to this dish, and is a favorite seasoning I use often in my kitchen.


Easy Tomato Pie

Ingredients:
Single pie crust
4 tomatoes
3/4 cup mayonnaise
1 cup monterrey jack cheese, shredded
salt, pepper, dried parsley flakes

Directions:
Preheat oven to 350 degrees F.
Place the pie crust in a pie dish and bake for 5 minutes.
Thinly slice the tomatoes.
Mix together mayonnaise and cheese.

After baking the crust, spread a thin layer of the mayo/cheese mixture.
Place tomato slices on, sprinkling with salt, pepper, and parsley.
Spread another thin layer of mayo/cheese mixture on top.
Place another layer of sliced tomatoes with seasoning.
End with spreading the rest of the mayo/cheese mixture on top.
Bake at 350 degrees F for 30 minutes.
Let rest for at least 10 minutes before slicing.

Monday, October 2, 2017

Moving chicks from brooder to outside


With our weather being unseasonably warm, I was able to move the chicks out of the brooder sooner than anticipated.


They are growing strong and changing daily.  Read more about the transition here.

Friday, September 15, 2017

Farm Photo Friday (September 15, 2017)


Welcome to LL Farm's Photo Friday!


There is lots happening around our little farm this time of year.  Grab something warm to drink on this cool morning and join Pumpkin, the cat, and me as we walk around.


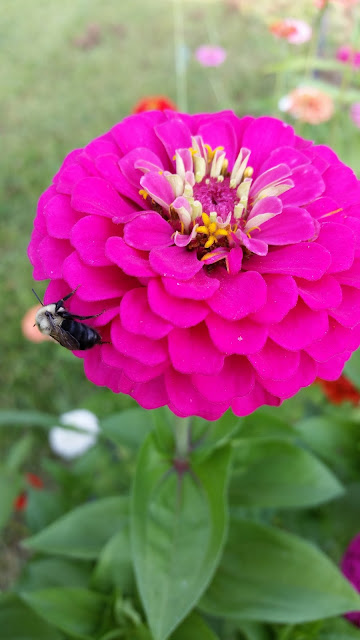
The zinnias are still blooming beautifully.
The bees and butterflies have enjoyed them, almost as much as me.


I love the vibrant colors along the fence.


And in a mason jar on the deck.


I also love bringing them inside.  I've already bought zinnia seeds for next year!

And on a side note...see that blue and white tea towel?  I got it this summer when we went to London, England.  I purchased it from a quaint little shop in the Cotswolds, England's beautiful country side.


I picked a whole basket of apples this year from our tree.
I made applesauce and almond apple crisp with these babies...yummy!


The peppers were a flop this summer...hardly any harvest.
I'm glad I left them in the garden though, because they have finally decided to join the garden party.


Yes!  Strawberries in September.
I planted 8 strawberry plants in the Spring, and although not much of a harvest, they are still providing some good snacks.


Because we did raised bed gardening this year, I am able to have a fall garden.  This has me quite excited!
The radishes have already been thinned.


Another round of sugar snap peas are a welcome sight.
I love them raw or lightly sauteed.


Lettuce, kale, and spinach have popped through.
I saved a few onion starts, hoping they would grow.  Yes!! They are.
A fresh garden salad in the fall, yes please!


The weather has been unseasonably cool, but I'm not complaining.  Fall is my absolute favorite season!
When mums and firewood adorn our front porch, it means fall is knocking at the door.


This gas fire table is awesome on our DIY deck.  It's so convenient to have on for just a little while, without the work of having a wood fire.


The ladies have also been enjoying the cool weather.
It's the perfect temperature for a day at the chicken spa!


And, we can't forget the baby chicks, that are now 3 weeks old.
They are growing healthy inside our garage.
This little white crested polish is a hoot to take pictures of...just look at that hair-do!

* In case you missed it - The text that is in bold red throughout this post will take you to other posts about that subject. *

** This weekend is the Country Living Fair in Columbus, Ohio.  I'll be there with my Mom! **

Monday, September 11, 2017

Homemade Tomato Sauce (No Peeling Required)


Preserving tomatoes.  It's something I've been doing for a few years now.  And, although I enjoy the final project, let me be honest...prepping the tomatoes is a messy, time consuming chore that I don't enjoy.  Marking the tomatoes with an X, blanching them, plunging them into an ice bath, then peeling the skin away...it's a lot of work!  I even tried the food mill strainer/sauce maker.  Let's just say that I made a bit of a mess and move away from the subject.


The garden has been generous with tomatoes this year, but I was dreading the preserving process.  I thought, why go through that mess...there has to be an easier way.  By cooking (or oven roasting) the cut tomatoes and using an immersion blender, this homemade tomato sauce is now my go-to way of preserving the harvest - no peeling necessary!  I currently have some stored in the freezer and in jars on my pantry shelves.  

Thursday, September 7, 2017

Oven Roasted Tomatoes


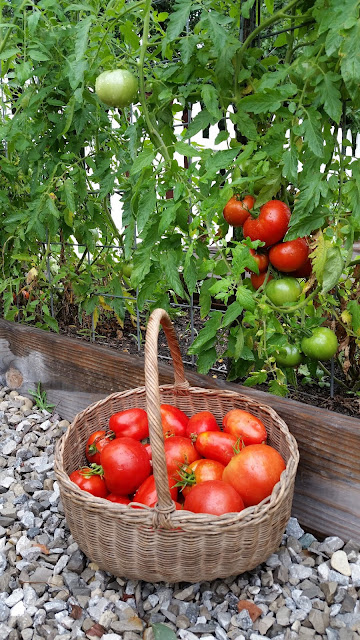
The garden is still producing beautiful tomatoes!
Along with eating them fresh, I have canned some and I have froze some.
One of my favorite ways to prepare garden fresh tomatoes is oven roasted.  


This summer, I did this for the first time, and I quickly asked myself, "why did you wait so long to do this?"

Related Posts Plugin for WordPress, Blogger...